PeopleConnect says its Suppression Center covers name searches on all of its people-search sites. The company specifically names four sites, which are TruthFinder, Instant Checkmate, Intelius, and US Search. The request is free, but it asks for more identity information than most removal forms.
Want the background first? The PeopleConnect profile covers the brands, the corporate chain, the 2023 customer-account leak, and the yearbook litigation.
At a glance
What this takes
Cost
Free
Time
About 15 minutes in one sitting - two verification round-trips, no saved progress
Account needed?
No, but you verify twice
Method
Email link, a code to a contact method already on your record, then setting the record to Suppressed
TruthFinder · Instant Checkmate · Intelius · US Search
Does not cover
Classmates · phone/address lookups · public records
You'll need
Date of birth, legal name, and access to an email or phone on your record
Understand the limit before you start. Suppression applies to name-based search results. It doesn't stop a report pulled by phone number, address, or email, and it doesn't touch public records such as sex-offender registries. That's the company's own description of its tool, and it's the single thing most write-ups leave out.
The steps
Remove your listing
01
Enter your email address
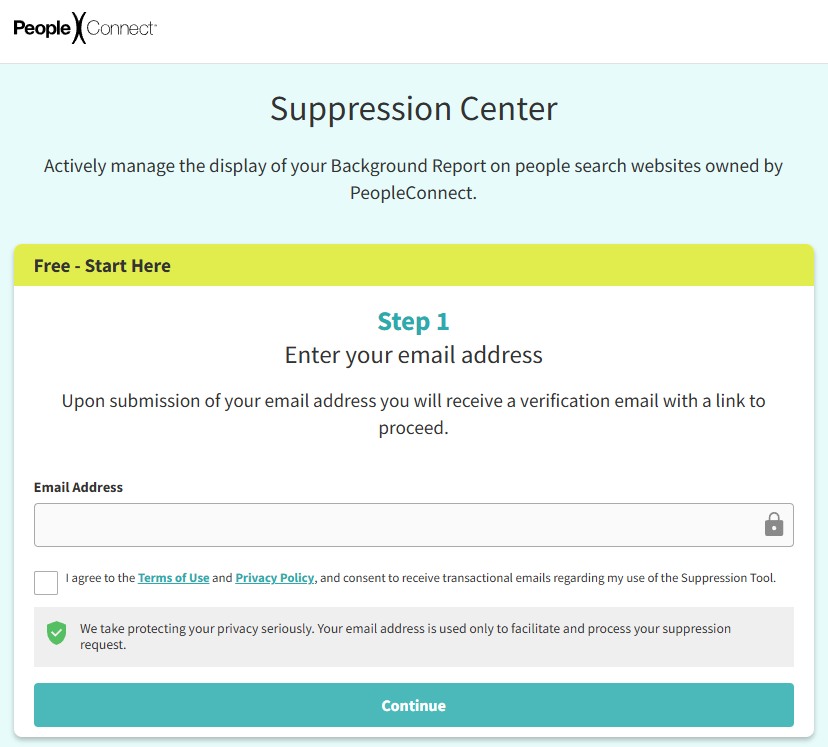
Open the Suppression Center - the "Free - Start Here" panel is Step 1. Enter your email address, tick the Terms of Use and Privacy Policy checkbox, and hit Continue.
A masked or secondary address you can open straight away works fine here and is the better choice - you're about to hand this company a date of birth, so there's no reason to add your primary email to the pile if you don't have to.
Step 1 on the Suppression Center - your email starts the process.
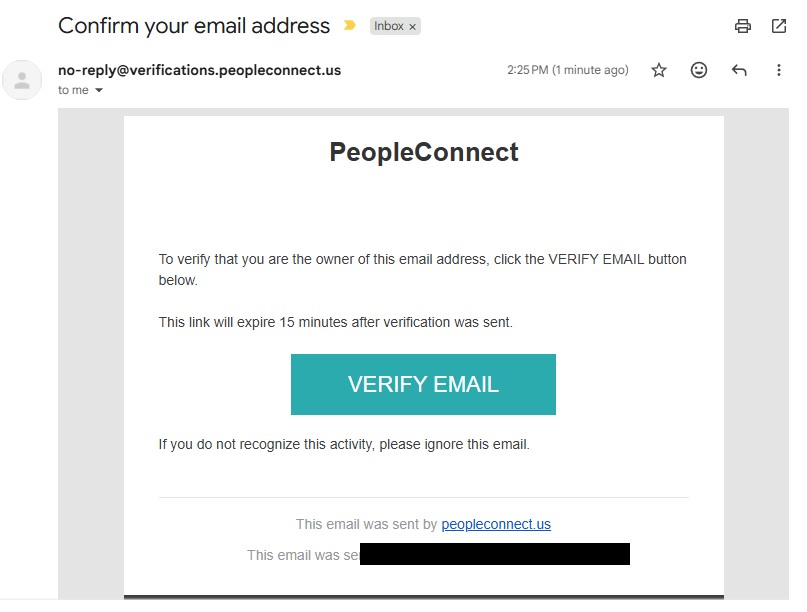
The email's own text says the link expires 15 minutes after it was sent, so open it right away rather than saving it for later. If it lapses, start over from the email form.
The verification email - the link is only good for 15 minutes.
03
Enter your date of birth
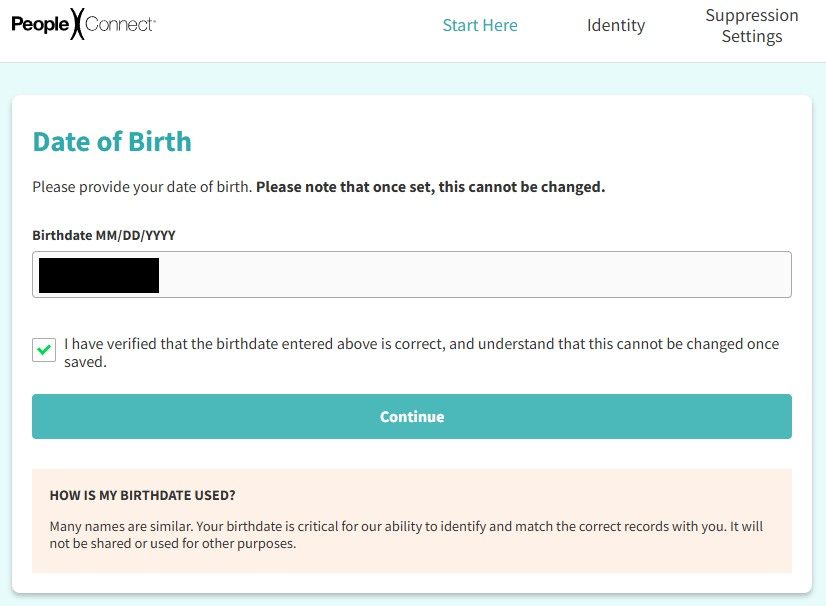
The next screen asks for your date of birth, with a checkbox confirming you've verified it. The site's stated reason is record matching - many names are similar, and the birthdate is how it tells records apart.
The Date of Birth screen - check it before you continue.
The birthdate is permanent. The page's own bold text: once set, it can't be changed. Double-check it before hitting Continue, because a typo here can't be corrected later in the tool.
04
Enter your full name
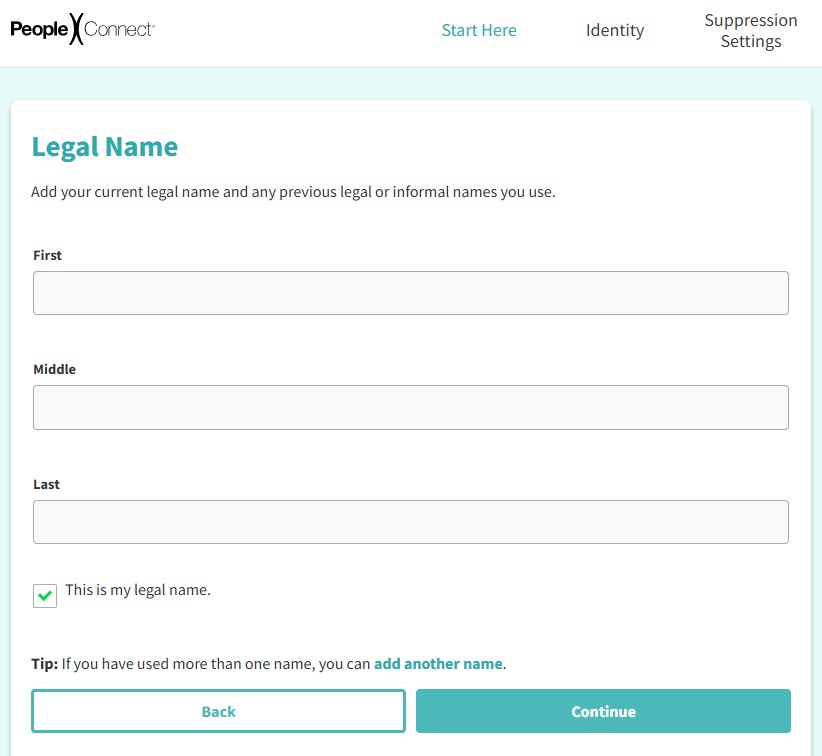
The Legal Name page takes your first, middle, and last name, with a "This is my legal name" checkbox. If you've gone by more than one name - a maiden name, a middle-initial variant - use add another name so the search covers them all.
The Legal Name page - add former names here too.
05
Choose your name from the list of results
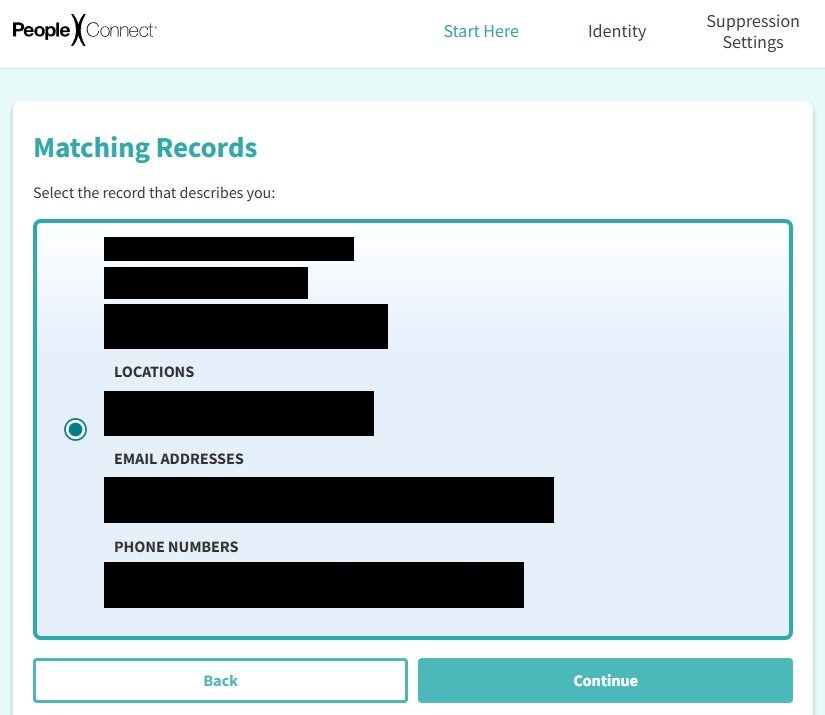
The Matching Records page lists candidate records, each with its known aliases, location history, and partially masked email addresses and phone numbers. Check the locations and aliases before selecting - common names cluster together - then pick the record that's you and hit Continue.
Matching Records - check the aliases and locations, then select yours.
06
Verify through a contact method on the record
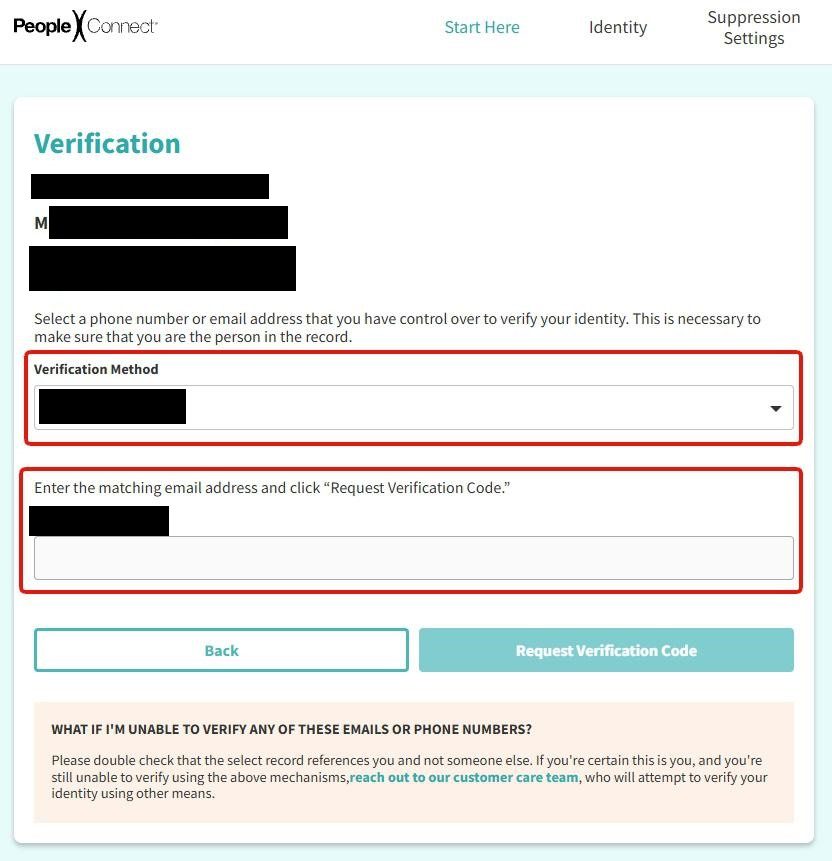
The verification gate is a Verification Method dropdown of the contact methods already on your record - old phone numbers and email addresses, partially masked. Picking one doesn't send anything on its own: type the full, unmasked value into the field underneath, headed "Enter the matching email address and click 'Request Verification Code.'", then click Request Verification Code. A code field appears on the same page once you do.
Pick the masked credential, type it out in full, then request the code.
If you don't have access to any of the contact methods in the dropdown, the tool dead-ends. Old numbers and addresses you've long since lost are exactly what tends to be on these records. When none of them work for you, you'll have to reach out manually at privacy@peopleconnect.us instead.
07
Enter the code and click Submit Verification Code
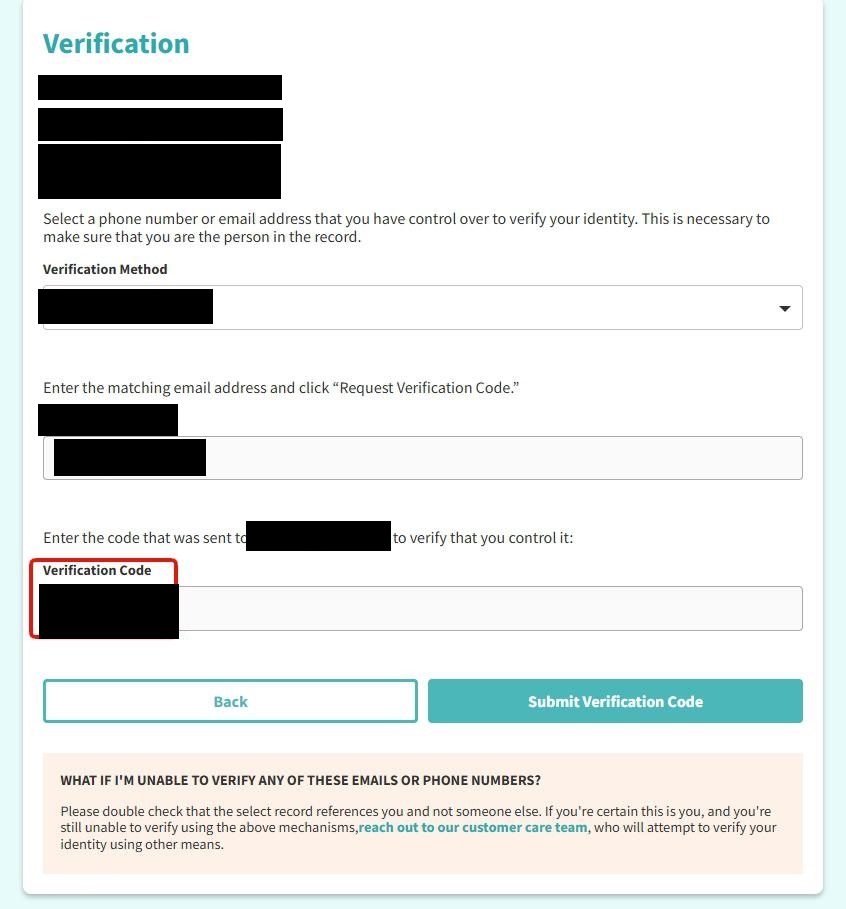
The page grows a Verification Code box under the contact you verified. Type the code in and click Submit Verification Code - it doesn't submit on its own, and a reader who types the code and waits sits on this screen indefinitely.
Type the code into the box, then click the button - nothing submits automatically.
08
Click Continue, then set Desired Behavior to Suppressed and save
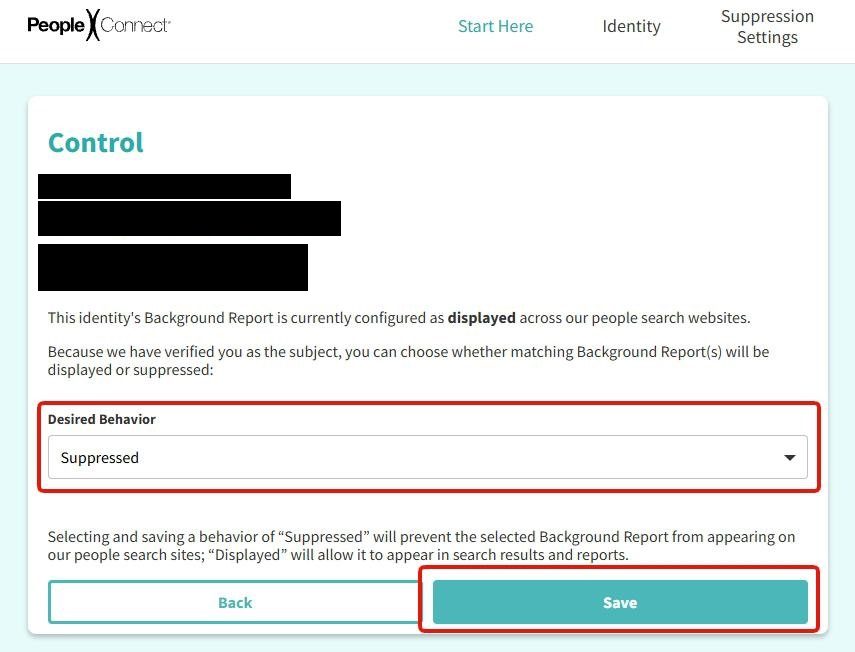
The code proves the record is yours; it doesn't hide it. The screen that follows says so - "Select 'Continue' to manage suppression rules for this record" - and the Control page behind it opens with your report still displayed. Open the Desired Behavior dropdown, choose Suppressed, and click Save. That one setting covers TruthFinder, Intelius, Instant Checkmate, and US Search.
The record stays displayed until you choose Suppressed and save.
Stopping at the green "Verified" banner leaves you listed. Verifying and suppressing are two different screens, and only the second one changes what the sites show.
The rest of the family
Where the tool applies
PeopleConnect says the Suppression Center covers name searches on all people-search sites in its family. The page specifically names TruthFinder.com, InstantCheckmate.com, Intelius.com, and USSearch.com. The company reserves the right to discontinue the tool.
Classmates.com is explicitly excluded. It holds yearbook photographs and school records, and it needs its own removal process. The Suppression Center won't remove an old school photo.
Coverage of the other domains depends on what each site does. Intelius, LLC's California data broker filing lists 22 domains. ZabaSearch and Addresses.com publish name listings as Intelius people-search sites, so PeopleConnect's broad wording includes those listings even though it doesn't name either site. Other domains act as directories or send searches to Intelius and US Search. Check every site where you found your information, and email privacy@intelius.com about anything still showing.
Search your name on the four named sites a few days later. A "48 hours" turnaround appears in third party guides but not on PeopleConnect's page, so treat it as unverified.
Also search for yourself by phone number and by address, not only by name. If you still appear, email privacy@peopleconnect.us because the Suppression Center only covers name searches.
Keep the confirmation email. About one in twenty deletion requests across the family's three registrants was denied in 2024, so keep proof of what you asked for and when.
If it fails
Troubleshooting
No verification email. Check spam, then try a different address. The link is the only way in - there's no route that skips it. And it expires 15 minutes after it's sent, so a stale link failing isn't a broken flow - submit the form again for a fresh one.
Your record isn't in the results. Try the address the listing was built around rather than your current one, and try former names. These databases index history.
Suppressed, but still findable. Check how you found yourself. If it was a phone or address lookup, that's outside what suppression covers by the company's own description. Email privacy@peopleconnect.us and ask for deletion rather than suppression, naming the specific report type.
Ignore the unverified contact details. A phone number of 888-245-1655 and a 48-hour window appear in third-party guides and on none of PeopleConnect's own pages. privacy@peopleconnect.us is the address the company actually publishes.
You had a TruthFinder or Instant Checkmate subscription before 2019. Your customer account was in the 20.2-million-record backup that leaked in February 2023 - email address, name, phone number, and a hashed password. Change that password anywhere you reused it. Suppression does nothing about it.
Staying off
Keeping it from coming back
Suppression changes how PeopleConnect displays your record, but it doesn't delete the source data. A new address or court filing can create a record that an earlier suppression doesn't cover.
Recheck the four named sites each quarter. Also check ZabaSearch and Addresses.com because they publish name listings, and check Classmates separately because the tool excludes it. Redact's data broker scan tracks the wider set of domains on the Intelius filing as well.
Take yourself off data broker sites
Redact scans data broker sites from your device, finds where your details are listed, and submits the removal requests for you. If a broker relists you, it files again.
September 10, 2026 · The note on the wider Intelius filing now quotes the Suppression Center's own statement of its reach, read from its start page that day. August 10, 2026 · Steps up to record selection rebuilt from a real walkthrough of the Suppression Center: email link (15-minute expiry), date of birth (permanent once set), legal name, then record selection, with five step screenshots. There's no address step. That walk stopped at record selection, so the verification screens and the Control page after them are documented from the Intelius walk of May 21, 2026, which captured all of them: the code only proves the record is yours, and the record stays displayed until Desired Behavior is set to Suppressed and saved.